Official Luthiers Forum! http://mowrystrings.luthiersforum.com/forum/ |
|
Introduction and latest custom build PICS http://mowrystrings.luthiersforum.com/forum/viewtopic.php?f=10123&t=45273 |
Page 1 of 1 |
Author: | Ryanpg [ Wed Mar 04, 2015 11:28 pm ] |
Post subject: | Introduction and latest custom build PICS |
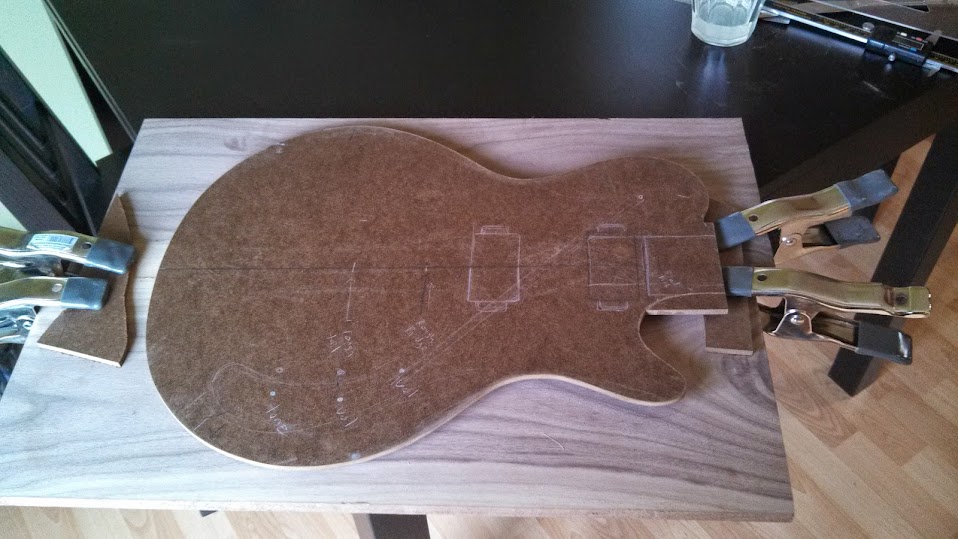
Hi all, I'm pretty new here and have gotten some great advice from members on a Melody Maker project. I thought it might be fun for me to share (one variation) of my process for a custom build. I'll let the pics do the talking as much as I can. Hope you guys/gals enjoy! African Mahogany Body Cross cutting on the old Craftsman Radial Arm Glued up. Nice grain pattern. Walnut cap glued up. Nice figuring! Not shown, routed a channel in the mahogany for wiring, cap glued on. Sanding and shaping the body template. Inspired by the Ibanez PF series. Cut the body, used the radial arm as an overarm router. Not the best way (spindle too slow really) but it works. I'm doing my favorite control route: telecaster plate in back. More routing. Scored the recess for the metal plate. Oops! No big deal, will still thickness sand it. Carving the belly cut with the angle grinder and an 80 grit disc. Worst possible way to do a switch cavity. See what I mean! Talk about bit bite! Again, will disappear with final thickness sanding. Time to carve the top. I like this 70s style "furniture" detail! Grind away! This is the fun part! On to the neck. Cut the truss rod channel. Decided on a scarf "luthier's joint" for the headstock. Roughed in the shape on the band saw. Then attacked with the angle grinder again! Volute for the win! Finished roughing and routing the back. That's just a "relief" idea I had. Love the upper fret access. AND this is a 24 fret guitar, it's LONG! Decided this would be all wood and metal, so maple inlay fret markers. Routing the neck angle tenon. See how scientific I am about angles and stuff! Routed for humbuckers. Offset mortise and tenon routed. Blending the neck joint. My "fret press." My trick for quickly trimming fret ends. Almost ready to glue it all up! Glued and waiting for finishing! Almost final pics! I glued a walnut veneer on the headstock. I've since installed chrome hardware including covered pickups and metal rings and metal knobs as seen in the last few pics. |
Author: | Freeman [ Thu Mar 05, 2015 10:00 pm ] |
Post subject: | Re: Introduction and latest custom build PICS |
Lots of really nice detail touches. Thanks |
Author: | dzsmith [ Fri Mar 06, 2015 10:00 am ] |
Post subject: | Re: Introduction and latest custom build PICS |
Ryan, Wow! Very nice! I like your design. The fret end trimmer is a clever idea. What finish did you use? Dan |
Author: | Chris Pile [ Fri Mar 06, 2015 10:55 am ] |
Post subject: | Re: Introduction and latest custom build PICS |
I like it! |
Author: | Ryanpg [ Fri Mar 06, 2015 12:33 pm ] |
Post subject: | Re: Introduction and latest custom build PICS |
Thanks Dan, Chris and Freeman! Dan, it's. . . complicated. (-: the body back and sides were grain filled by French polish, then tru-oil over that, and tru-oil on the neck for a "natural feel." The walnut cap was cyanoacrylate pore filled and clear acrylic lacquer, just for extra depth and gloss. Re: fret ends. I love to "make do" with the tools I have when I can. This method worked really great with the fretboard not attached. I adjusted my "depth" and just pushed the board back and forth. The fence made it almost error-proof. I could have gotten a nice rolled edge, or a really nice bevel if the neck were bound. Will definitely use this method again! |
Author: | sdsollod [ Fri Mar 06, 2015 1:59 pm ] |
Post subject: | Re: Introduction and latest custom build PICS |
Ryan, Very nicely done! What hardware (bridge) are you using? Steve |
Author: | Ryanpg [ Fri Mar 06, 2015 2:09 pm ] |
Post subject: | Re: Introduction and latest custom build PICS |
Steve, since this build was very much an homage to 70s import guitars, I chose a harmonica style bridge (and added tusq saddles). I had to fabricate the saddle screws and nuts myself, which is why they may look a little funky. (Used brass rod, tapped on my metal lathe.) If you would like the exact model, and where I got it, I'll have to dig through my notes - let me know! |
Author: | Alex Kleon [ Fri Mar 06, 2015 11:30 pm ] |
Post subject: | Re: Introduction and latest custom build PICS |
Beauty! The walnut looks great! Alex |
Author: | cphanna [ Sat Mar 07, 2015 1:07 am ] |
Post subject: | Re: Introduction and latest custom build PICS |
Hey, Ryan, I honestly don't know much about solid body guitars, but every now and then I see one that fascinates me. Yours is one that I really like. Lots of nice details and I especially like the way you chose and joined the walnut top so that the grain seems to conform to the body shape. That's pretty cool. Also, I appreciate the fact that you uploaded lots of process photos. I'm always interested in the way other people do their processes. I think you've made a very nice instrument here. Looks like your poor dog is plumb tuckered out from supervising you in the shop! Patrick |
Author: | Jason Rodgers [ Sat Mar 14, 2015 1:06 pm ] |
Post subject: | Re: Introduction and latest custom build PICS |
Nice! Great documentation. And I'm totally stealing the fret end grinder jig! Just gotta be careful not to heat em up too much. |
Author: | rlrhett [ Sat Mar 14, 2015 2:58 pm ] |
Post subject: | Re: Introduction and latest custom build PICS |
Love the fret end dressing/beveler. What is that grinding wheel? It looks bull nosed from the picture. Is that right? Sent from my iPhone using Tapatalk |
Author: | Beazy [ Sun Mar 15, 2015 10:34 pm ] |
Post subject: | Re: Introduction and latest custom build PICS |
I really like the look of the walnut cap. I hope your dog wasn't too critical of the build. He's looking at it pretty intensely out there on the deck! |
Author: | Ryanpg [ Sun Mar 29, 2015 4:13 pm ] |
Post subject: | Re: Introduction and latest custom build PICS |
rlrhett wrote: Love the fret end dressing/beveler. What is that grinding wheel? It looks bull nosed from the picture. Is that right? Sorry it took SOOO long to get back to you. It's not exactly a bull nose. The tip is straight and conical. No Rounding. I think any flat edge wheel would work in this setup, just have to adjust the angle properly. Thanks! |
Author: | JimO [ Sun Mar 29, 2015 5:01 pm ] |
Post subject: | Re: Introduction and latest custom build PICS |
My old angle grinder died. I forgot how useful they are. Need to get another one. Had a sanding disk that would chew thru wood. Nice build. |
Page 1 of 1 | All times are UTC - 5 hours |
Powered by phpBB® Forum Software © phpBB Group http://www.phpbb.com/ |