Official Luthiers Forum!
http://mowrystrings.luthiersforum.com/forum/

"Dry" Side Bending (long one)
http://mowrystrings.luthiersforum.com/forum/viewtopic.php?f=10102&t=15206
Page 1 of 1

Author:  Brad Way [ Tue Jan 01, 2008 9:22 am ]
Post subject: 

A while ago I made the mistake and watched the Taylor Guitars Factory Friday video on the side bending. If you have not seen this then you must check it out! I was amazed by the way Taylor was able to bend sides and reduce the number of variables to just one. They only vary the bending speed (slow and fast) and everything else is the same for all woods! Of course I am sure that the Taylors benders cost big $$$ so at first it didn't seem possible building a bender similar to theirs.

After some thought I did figure out how I could use many of the concepts Taylor used without fully automating the process like they do.

So here is my side bending process that uses many of the same principles as Taylor. Please note that this project was lots of work and by no means is a quick fix to making a better bender. My goal was the design a better process. If your goal is to build guitars then just build a Fox or Doolin and get to work. If you enjoy designing and building a better process than you may find this interesting.

Before I start here are a couple facts that I picked up in my research on bending wood that I think are worth noting:

1) Heating or steaming wood radically changes its compression properties but has no effect on its tensile properties. What I gained from this is that if heat is applied to the inside of a bend it will be most effective..this also ties into what Taylor does.

2) Heating dry wood will create moisture but since the wood will dry out quickly using this approach it is important to only apply heat to the areas that are being bent and not the entire piece of wood.

3) Using stainless steel slats under tension helps keep the wood from breaking at the outside of the bend... the point where the wood is highly stressed (tensile) from the bending process.

I will walk though the steps and hopefully you will get the idea.

Sample Walnut, .102 thick
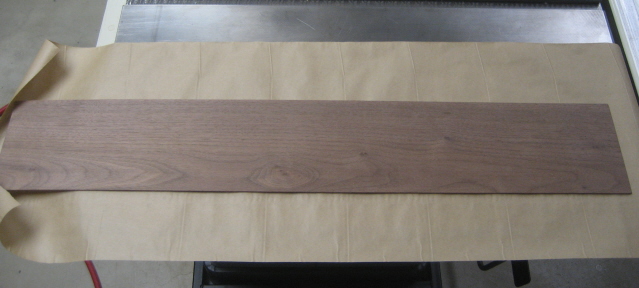

Wrap in kraft paper
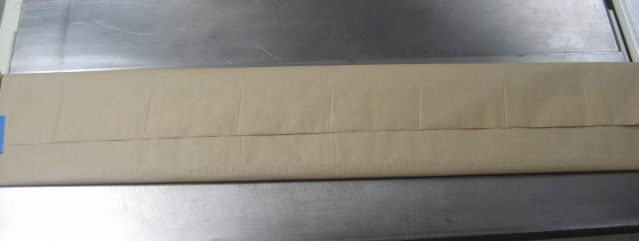


Bender is heated to 280-300 degress AND then the wood is loaded into the bender. I only want to heat the wood when I am bending to not dry it out.
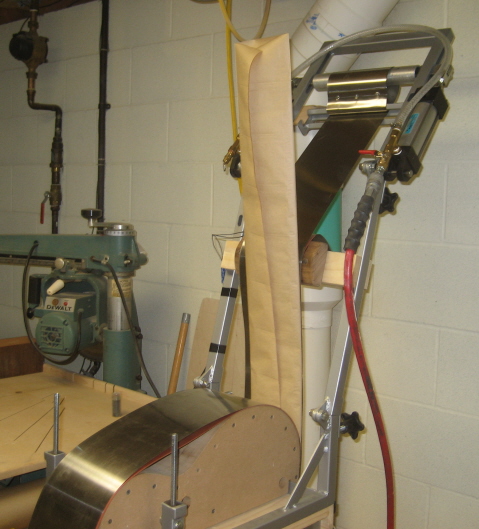

At this point I support the upper arm of the bender, hook the lower slat with the upper slat and apply 40 psi to the air cylinders to pull the slats in tension.
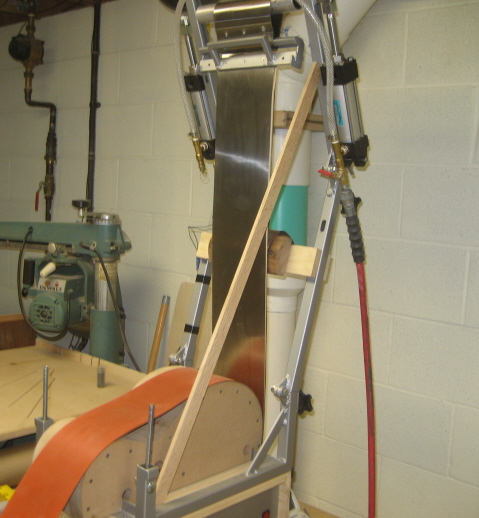

I bend the upper arm back which creates about 75% of the waist bend.
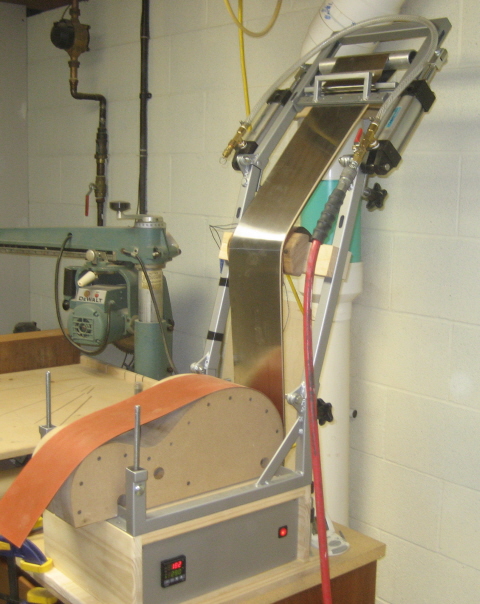

Keep in mind that I have a 5 x 6 heating blanket at the waist caul to just heat the waist.
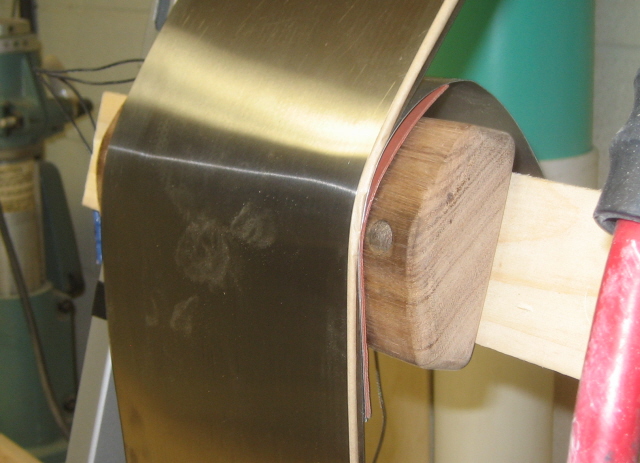

Bending the lower bout.
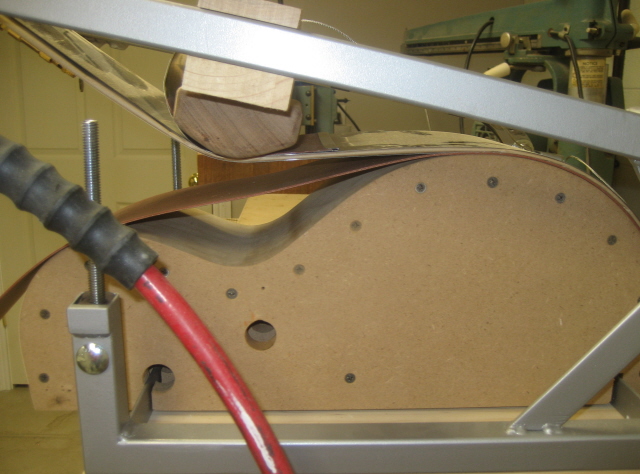

I now tighten two clamp knobs that brings the waist in tight with the form.
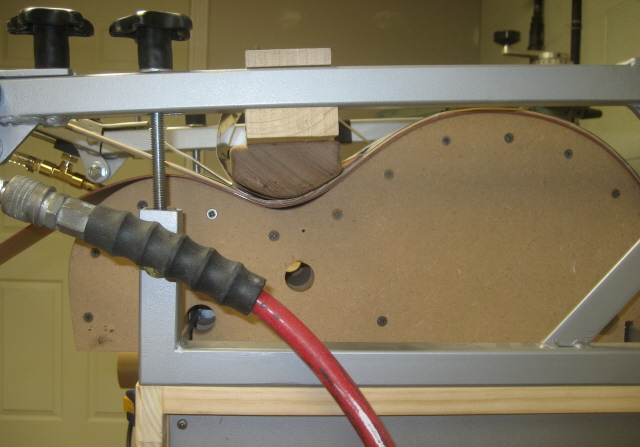

Bird's eye view. Ready to bend the upper bout.
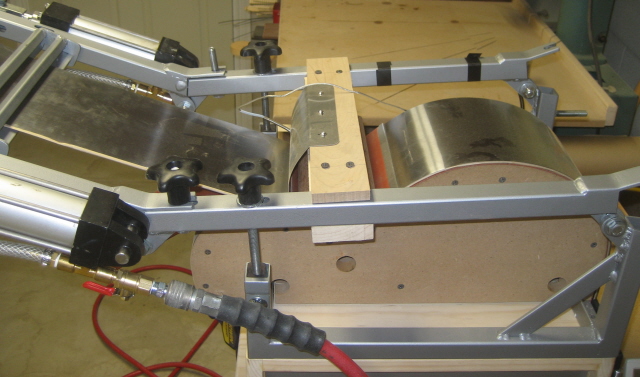

Bend the upper bout.
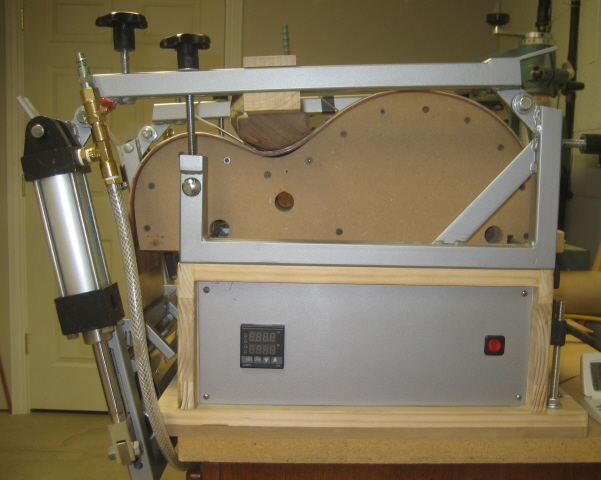

Let the wood cook for a few minutes (still working on how long)
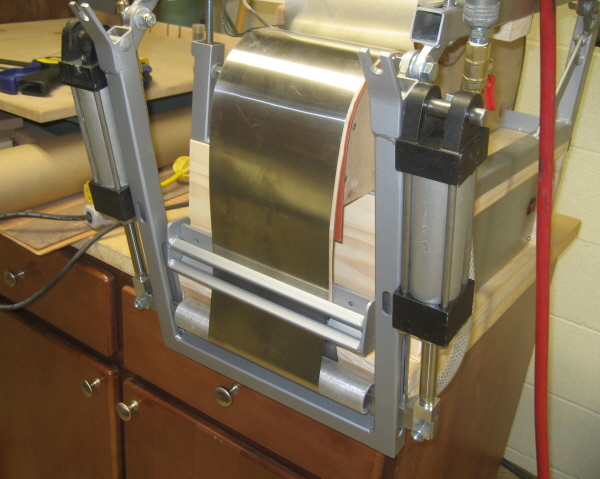

I release the pressure on the air cylinders and un-hook the lower slat from the the upper slat.
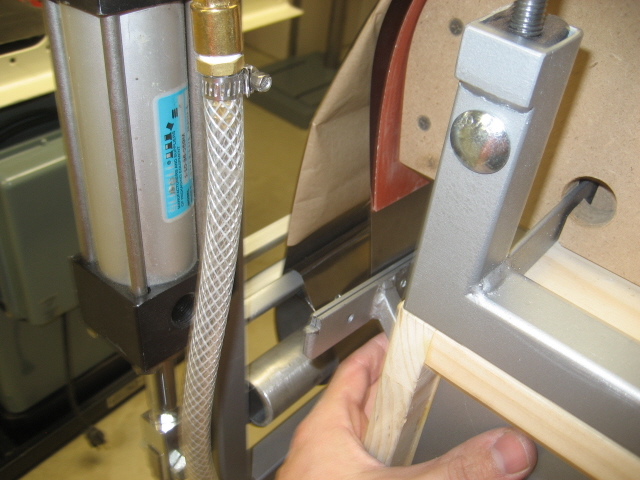

I return the bender arms to the original upright position. This leaves the bent wood on the mold which can easily be removed and the process started over for the next side.
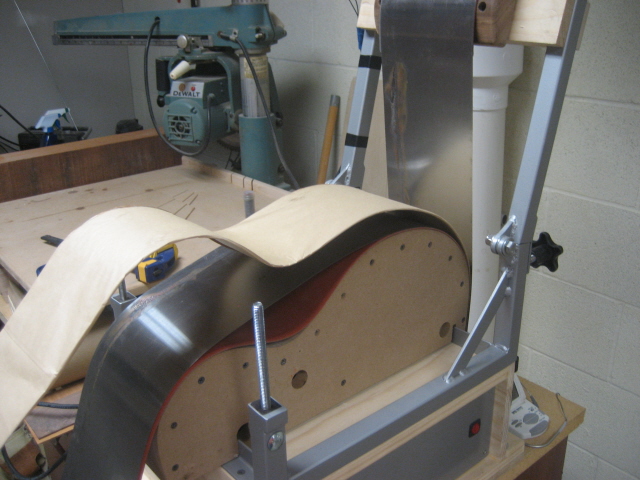

Ahhh....a newly bend side. (I have the side clamped between my table saw fence so it looks like there is no spring back but there is some)
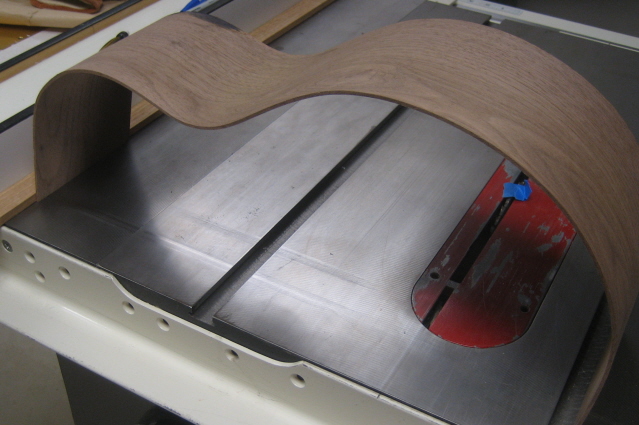

Since the sides are bent dry they don't cup, distort, or discolor.
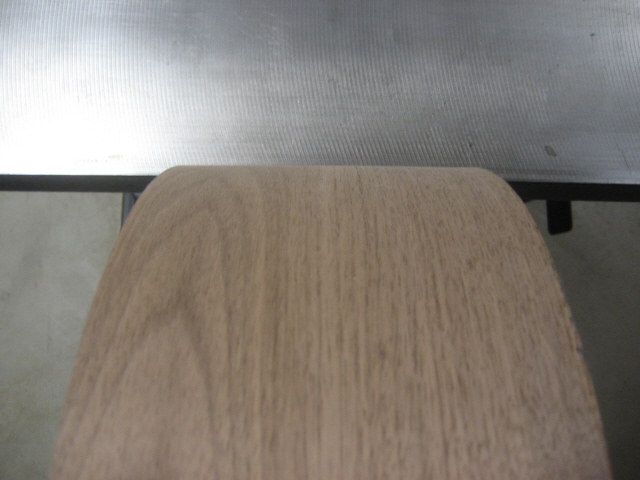

I am still working out the details but so far I have bent about 10 sides for testing and the results are very good. I even bent a curly maple side at about .120 thick just to push it and it had two small cracks in the waist.

Maybe this will inspire a few new thoughts on side bending.

And no...I don't plan to make these for resale.

Author:  mhammond [ Tue Jan 01, 2008 9:35 am ]
Post subject: 

    THIS is good stuff!

Author:  David Collins [ Tue Jan 01, 2008 9:54 am ]
Post subject: 

Very very nice system there. I'm impressed.

Author:  joelThompson [ Tue Jan 01, 2008 10:16 am ]
Post subject: 

wow i am very impressed i would think that there would real commercial
oppertunitys with this design i hope you have put a patent on it.

i would love to see someone make a comercial version of this.

well done

joel.

Author:  Hesh [ Tue Jan 01, 2008 10:50 am ]
Post subject: 

When it the lift-off for the Mars mission.....

Brad I am really glad that you are not a terrorist.......

This is yet another over the top, very innovative - high-tech jig from you - WOW!!!!

Is the keypad on the side keyless entry.......


Author:  Bill Greene [ Tue Jan 01, 2008 10:58 am ]
Post subject: 

This is the coolest thing I've ever seen.

Author:  Brad Way [ Tue Jan 01, 2008 11:12 am ]
Post subject: 

[Quote=Hesh]Is the keypad on the side keyless entry[/QUOTE]

Actually I was trying to figure out how to make thing work with a "Remote Starter".


Author:  FishtownMike [ Tue Jan 01, 2008 11:21 am ]
Post subject: 

Yes this a very interesting post. Thanks

Author:  KenH [ Tue Jan 01, 2008 11:34 am ]
Post subject: 

Outstanding device Brad! I cant wait to see the final version. You may have stumbled on something that will help all of us build better guitars.


The fact that the sides dont have any stain, warp or cupping is proof enough that you are really onto something good here.


THANKS!!


Author:  Steve Walden [ Tue Jan 01, 2008 11:44 am ]
Post subject: 

That is really neat!     .......I can't believe I said neat........


Brad - Very innovative.  Can you give us a ball park as to the amount you have spent on this?  TIA


Author:  Brad Way [ Tue Jan 01, 2008 11:59 am ]
Post subject: 

[Quote=WaldenWorx]Can you give us a ball park as to the amount you have spent on this?[/QUOTE]

Good questions? Well are some of the expenses....

1" Steel for frame, $50
Air Cylinders $10 ea. (Ebay)
Fittings for Pnumatics, $40
Temp Controller, Relay, Electronics, $100
Waist Blanket $35
Mold Blanket (Already had it $75)
Stainless Slats $25 (Ebay)
Misc. Bolts, Wood, $100?

Hard to really say the final cost. Many of the parts were from scrap so I didn't have to buy. Ebay is also a really great place to find surplus stuff at a greatly reduced cost.

Author:  Don Williams [ Tue Jan 01, 2008 12:53 pm ]
Post subject: 

Umm....yeah, too bad you went so simple with that little jig...


Nice work!


Author:  KThomas [ Tue Jan 01, 2008 1:55 pm ]
Post subject: 

Brad,


Yours is NICER than Taylor's.


Author:  James Orr [ Tue Jan 01, 2008 2:32 pm ]
Post subject: 

This is really cool, Brad. In premise, it seems like a Doolin bender, but
you've taken it a step further to pre-bend the waist. I'm really impressed
by the thinking that went into making this, getting each bend in exactly
the right place, etc. Thanks for posting this.

Author:  J.R. Hunter [ Tue Jan 01, 2008 3:23 pm ]
Post subject: 

Wow!!! I don't know what to say...You really oughta patent that- very ingenious!   I'll bet you were the kid that everybody wanted to peek over the shoulder of during science exams!


Thanks for sharing!


Author:  WaddyThomson [ Tue Jan 01, 2008 4:28 pm ]
Post subject: 

That is a really impressive process.  Your ingenuity shines in the design of your bender.   I really like the inside heat thingy for the waist bend.  Nice touch.  Does the fact that you are heating from both sides on the waist bend have any impact on the process?

Author:  Bob Garrish [ Tue Jan 01, 2008 8:50 pm ]
Post subject: 

Here's my next project, for sure. The way you executed it is just beautiful.

Author:  Vincent Simokovich [ Tue Jan 01, 2008 10:39 pm ]
Post subject: 

Hey Brad that walnut looks familiar! Nice job.

Vince

Author:  Brad Way [ Tue Jan 01, 2008 11:44 pm ]
Post subject: 

[Quote=WaddyT]Does the fact that you are heating from both sides on the waist bend have any impact on the process?[/QUOTE]

I am not sure that heating from both sides causes any problems. My original design used 2 blankets that were pressed against the wood on the inside of the slats. After some testing I found that all the extra heat just dried the wood out quicker and didn't really help the process. However, this is for bending dry. If I had spritzed the wood the extra heat would probably create more steam which could help the process.

[Quote=vinman]Hey Brad that walnut looks familiar[/QUOTE]
It sure does...all the extra mismatched sides really have worked out great for testing. Thanks for the wood!

Author:  mgcain [ Wed Jan 02, 2008 12:23 am ]
Post subject: 

Geez MacGuyver, what's your toaster look like? 


Very nice - How do you find time to dream up stuff like this?  Air Cylinders?  I'm still sweating at the palms at carving my first neck! Got anything for that?  a pneumatic carver built from leftover lawnmower parts, maybe? 


totally ingenious....you really ought to patent it. 


Mitch


Author:  Terence Kennedy [ Wed Jan 02, 2008 12:49 am ]
Post subject: 

Jaw dropping totally industrial rig Brad.  Wow!  Does it make latte?
Terry


Author:  Dave Anderson [ Wed Jan 02, 2008 1:42 am ]
Post subject: 

Impressive indeed, Brad!
Excellent design.

Author:  Ken Franklin [ Wed Jan 02, 2008 3:38 am ]
Post subject: 

It is better than Taylor's. I think this is what they were shooting for
originally. Maybe they'll steal yours.

Author:  stan thomison [ Wed Jan 02, 2008 5:31 am ]
Post subject: 

Brad first the circle cutter/rosette thing and now this. I envy you to have ability to look at something and then design and build things like that, particularly this rig. Outstanding

Page 1 of 1 All times are UTC - 5 hours
Powered by phpBB® Forum Software © phpBB Group
http://www.phpbb.com/