Official Luthiers Forum!
http://mowrystrings.luthiersforum.com/forum/

tutorial: diamond volute carving
http://mowrystrings.luthiersforum.com/forum/viewtopic.php?f=10102&t=12915
Page 1 of 1

Author:  Matt Gage [ Sun Jul 22, 2007 12:18 am ]
Post subject: 

Hi, James asked if i would share how i carve my volutes...
first a disclaimer: my methods are risky, use caution if you try this at home.

first I get my blank roughed out on the bandsaw.
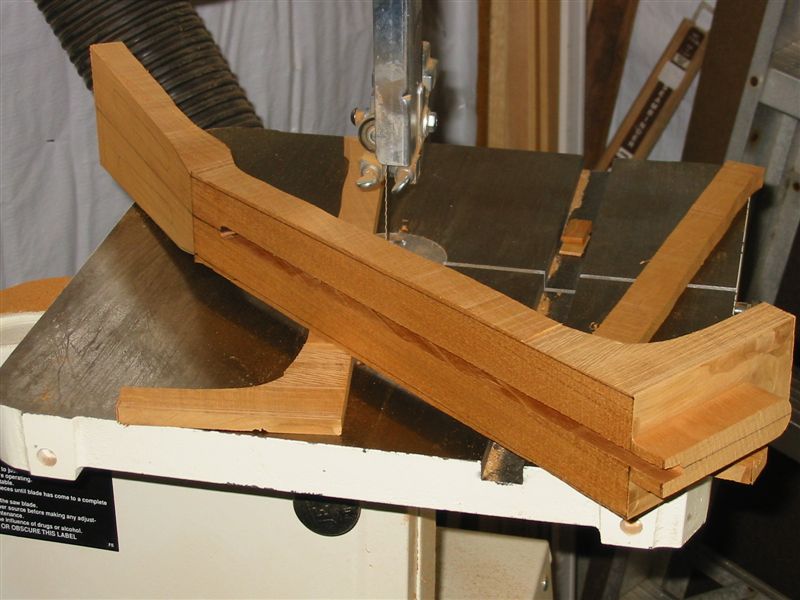

in this shot you can see the simple jig that i use to level the back of the headstock, and to rough out the diamond. if you look close you can see the lines i have drawn on the back of the headstock.
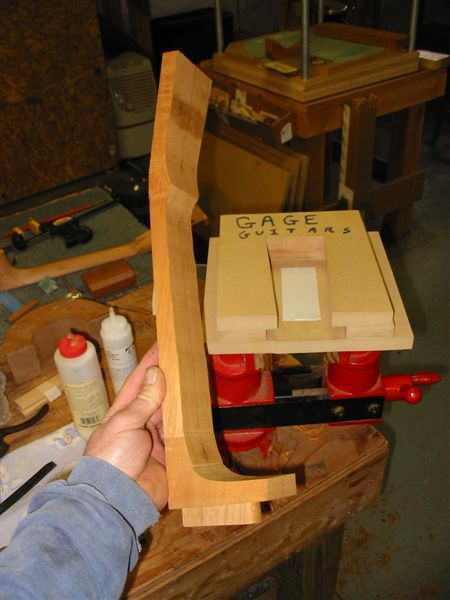

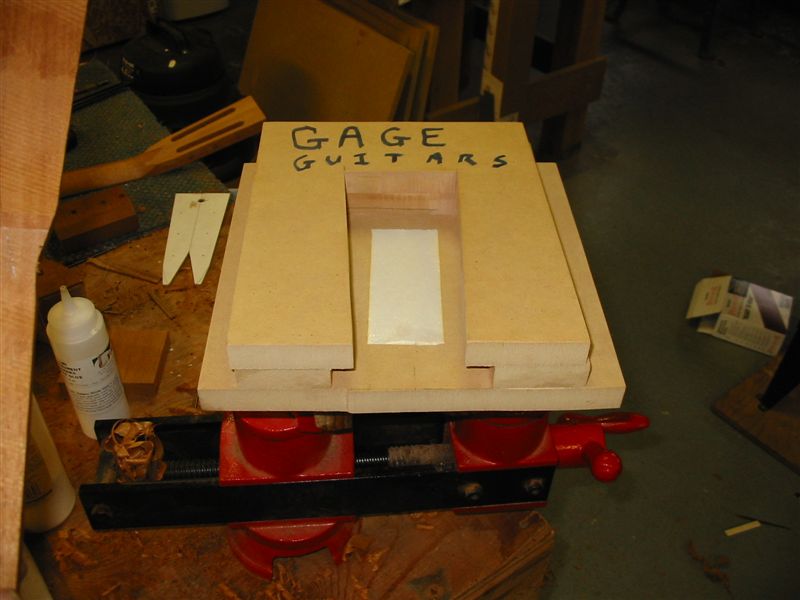
heres a closer look at the jig and my diamond Volute template.


The neck is held down by using double stick tape.


I set the router bit hight here on the outside of the jig.


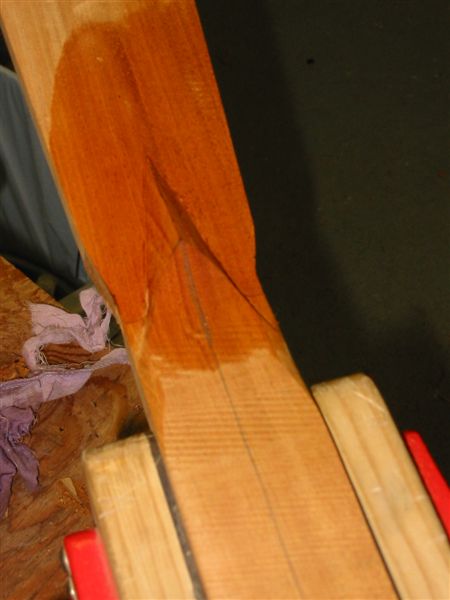
Now heres where you need to be carefull, I route the whole back of the headstock and up to the lines of the volute "free hand". I get as close as possible and then clean up the lines later with my chisel.


there is still alot to do on this to clean it up... but you get the general idea.

Good luck, and have fun!
Matt

Author:  LanceK [ Sun Jul 22, 2007 12:29 am ]
Post subject: 

Matt, the cap is off your glue! Its going to DRY UP!

Great little jig there! Man I gotta get me one of those vices!

How do you center it in the jig? I see the two sided tape that holds it in place.

Author:  James W B [ Sun Jul 22, 2007 1:25 am ]
Post subject: 

Thanks Matt.I hope that`s going on the tutorial page.I`m gonna give that a whirl.Great job
                                  James

Author:  WaddyThomson [ Sun Jul 22, 2007 1:57 am ]
Post subject: 

Matt, great tutorial.

Lance, looks to me like square top of headstock for alignment, and the part that is left high for the volute acts as the centering guide.


Author:  WaddyThomson [ Sun Jul 22, 2007 2:00 am ]
Post subject: 

Oh, I see.  The guide is as big as the headstock at the top, so just put it in the middle.  The only reason for the wider bottom portion is the so the wider top will slip through, but when it is in, the guide follows the sides of the headstock, otherwise you couldn't route to the edge.

Author:  Matt Gage [ Sun Jul 22, 2007 11:04 am ]
Post subject: 

actually there is no guide, the top section is just roughly the shape of the headstock.
the actual headstock is narrower, and there is about 3/8" clearance all the way around it.

the jig is really just for flattening the back of the headstock and roughing out the lines of the V.
I shape the outline of the headstock on a different jig that looks like this:


on this one, the jig follows the bearing bit, and cleans up my rough bandsaw cut.
it only trims off a little bit of material, and leaves me with a nice 1 3/4" nut width.

some day I`ll have a cnc... but for now this does nicely.

Author:  Heath Blair [ Sun Jul 22, 2007 11:10 am ]
Post subject: 

matt, thank you for posting this tutorial! simple, yet clever!

Author:  Alain Desforges [ Sun Jul 22, 2007 11:57 am ]
Post subject: 

Awesome Matt! Another problem solved!

Author:  Bruce Dickey [ Sun Jul 22, 2007 1:56 pm ]
Post subject: 

Thanks Matt. I've always been fascinated with the diamond volute. You make it easy for a novice. What bit are you using? TIA, Bruce

Author:  Matt Gage [ Sun Jul 22, 2007 11:22 pm ]
Post subject: 

Hi Bruce, I`m using a 3/4" straight bit with a flush bearing under.

i use this same bit for almost everything.

Matt


Author:  Bruce Dickey [ Mon Jul 23, 2007 5:12 am ]
Post subject: 

Matt, this is brilliant. Almost a no-brainer it's so simple. Sometimes it's the simple jigs that make so much sense.

I recently purchased a Wagner power planer to do the job of thinning the headstock accurately. I think this way is equally as good or better.


In this picture, what is the paper used for in the picture? Is that double sided tape to hold the neck in place? If it's not double sided tape, how do you hold the whole thing still for routing? TIA, Bruce

Author:  Bruce Dickey [ Mon Jul 23, 2007 5:14 am ]
Post subject: 

While you are at it Matt. How do you make your slots?
bd

Author:  Bruce Dickey [ Mon Jul 23, 2007 2:37 pm ]
Post subject: 

[QUOTE=Matt Gage]The neck is held down by using double stick tape. Matt[/QUOTE]

I missed that line between the photos, but did see the white tape in your jig. Makes sense. Thanks Matt. bd

Author:  Don Williams [ Tue Jul 24, 2007 2:28 am ]
Post subject: 

What?!! Only seven pictures??? Come on Matt, we could use a pic for each movement of the chisel too. Oh, and the sanding as well.


Nice tutorial...thanks.

Author:  Matt Gage [ Tue Jul 24, 2007 3:47 am ]
Post subject: 

yeah I`d like to try one of those power planers.

the router definitly leaves you with some sanding to do after. i try to make random passes with the router so there are no distiguishable straight lines that are hard to sand out.

gotta run,,its the UPS guy, My cases just showed up!


Page 1 of 1 All times are UTC - 5 hours
Powered by phpBB® Forum Software © phpBB Group
http://www.phpbb.com/