Official Luthiers Forum! http://mowrystrings.luthiersforum.com/forum/ |
|
First Acoustic Build - Martin OM Style http://mowrystrings.luthiersforum.com/forum/viewtopic.php?f=10101&t=50628 |
Page 1 of 6 |
Author: | Jules [ Sun May 13, 2018 3:25 pm ] |
Post subject: | First Acoustic Build - Martin OM Style |
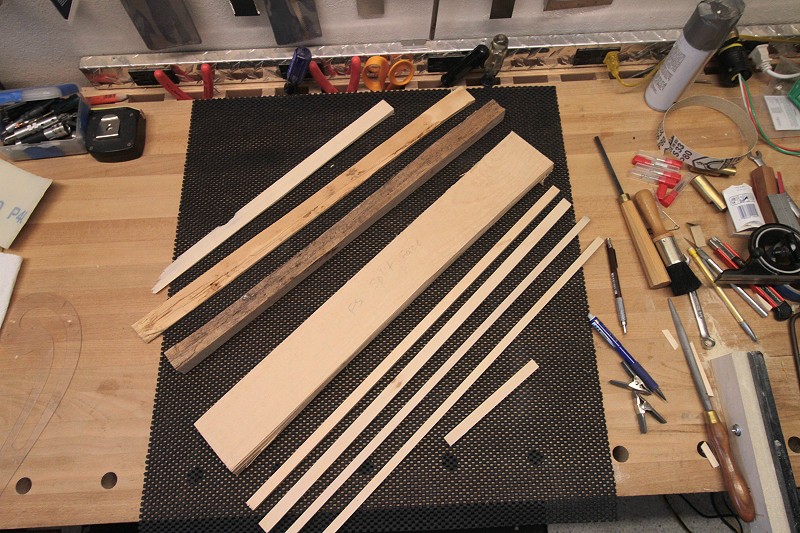
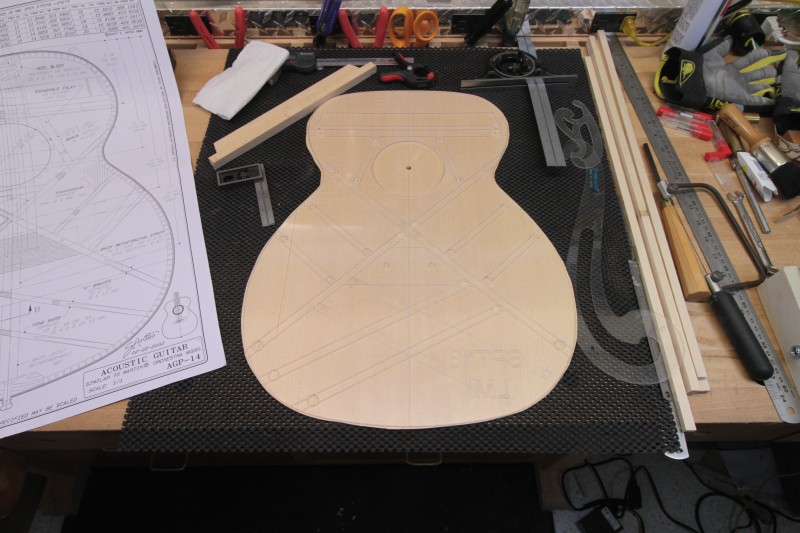
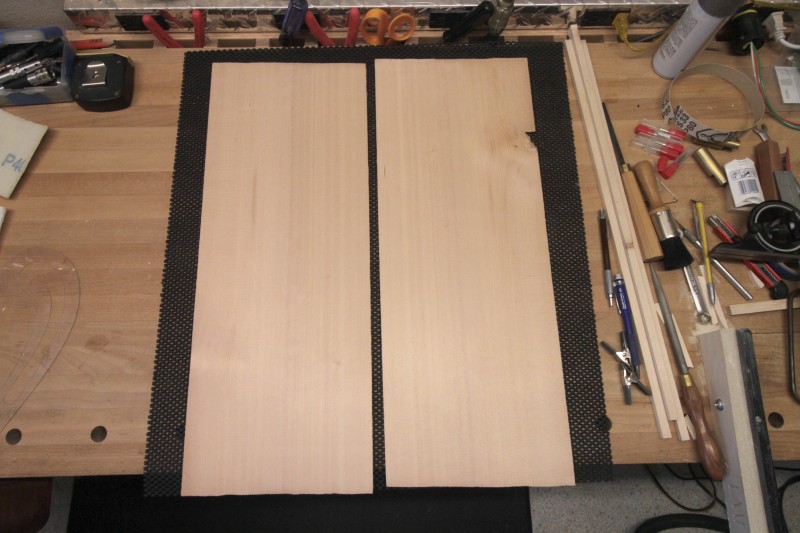
I must be getting lazy. Instead of doing everything from scratch, like I have on my electric guitars, I'm cutting some corners with plans, templates and forms from LMI. $8/set soundboards from Alaska Specialty Sitka spruce splits from AS LMI clear template Braces shaped but not glued |
Author: | Jules [ Sun May 13, 2018 3:31 pm ] |
Post subject: | Re: First Acoustic Build - Martin OM Style |
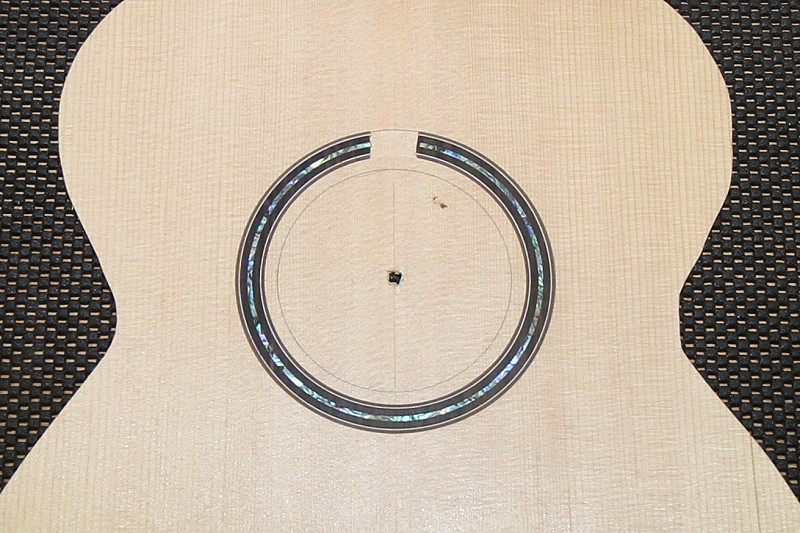
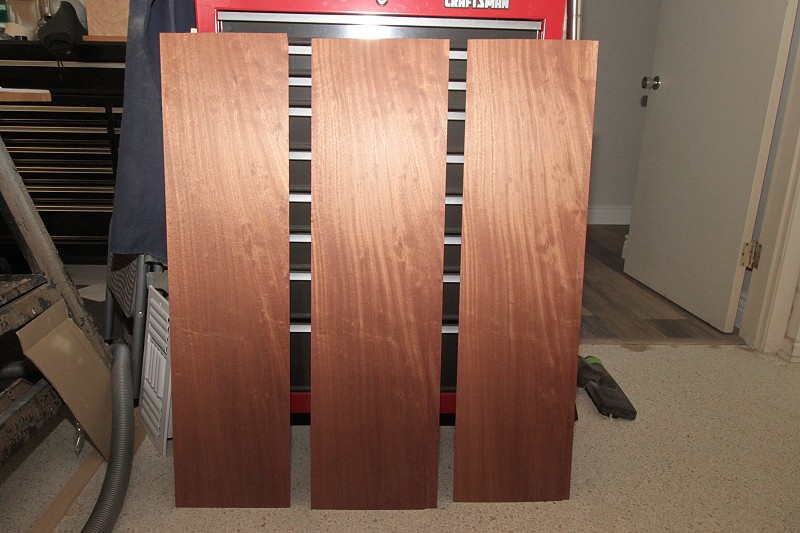
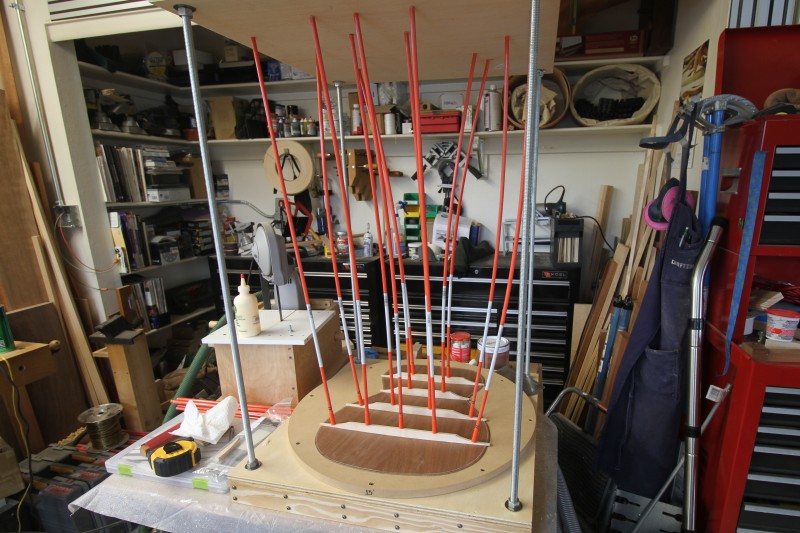
I picked up some pre-made rosettes. And milled up some sipo for the back and sides I went to glue up the soundboard braces with hot hide glue. When I went to use it I discovered I had forgotten to fill the pot with water and cooked the hot plate. Had to order a new hot plate, which is on the way. I decided PVA glue would be okay for the back so did that yesterday. My homemade go-bar deck gets it's first run And we're off! |
Author: | Jules [ Sun May 13, 2018 3:48 pm ] |
Post subject: | Re: First Acoustic Build - Martin OM Style |
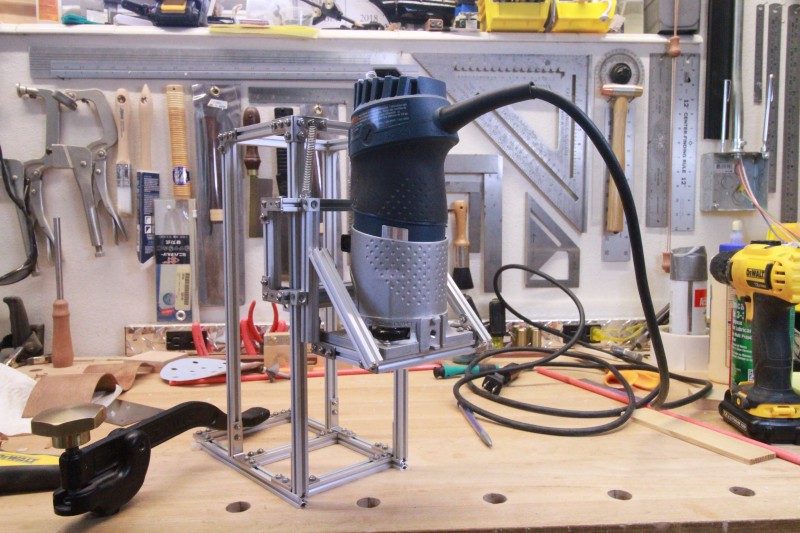
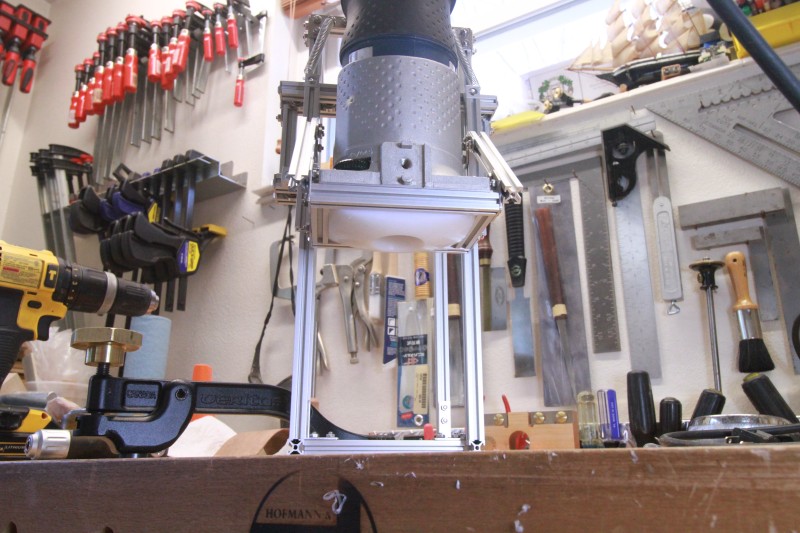
I made a router jig for binding from a Maker Beam kit I have On the underside I took a piece of HDMW to the lathe and finished shaping it with a plane and scraper. |
Author: | Joe Beaver [ Sun May 13, 2018 7:12 pm ] |
Post subject: | Re: First Acoustic Build - Martin OM Style |
Wow, good looking work area/tools and very nice start on that OM. At that rate it is bound to be a nice one |
Author: | Jules [ Mon May 14, 2018 9:54 am ] |
Post subject: | Re: First Acoustic Build - Martin OM Style |
Thanks, Joe. I wish I had the same confidence as you. There are so many questions rolling around in my head. One is, how do you determine where the build is going, as far as the sound it will develop? I bought 2 sets of $8 soundboards and one pricey one at $100. I tap tested each of the pieces individually. Three of the $8 halves sounded okay but one sung like a songbird. Notes and sustain over the other three that was easily noticeable. When I tapped the pricier halves, they sounded only slightly better musical than the 3 cheaper halves but not nearly as musical as the one that sung. So I'm asking myself, if you can't buy locally and have to rely on the tops being shipped in, how can you ever know how they will sound? I'm going to take this slowly and see how it develops. |
Author: | Jules [ Tue May 15, 2018 9:44 am ] |
Post subject: | Re: First Acoustic Build - Martin OM Style |
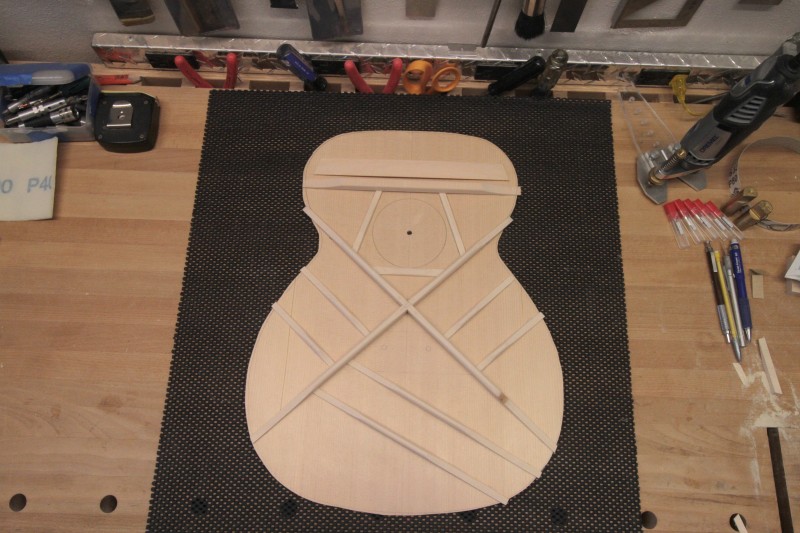
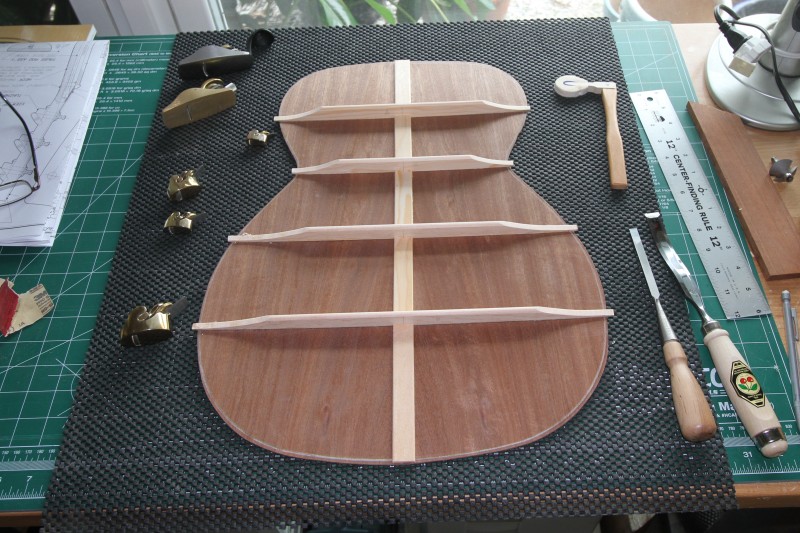
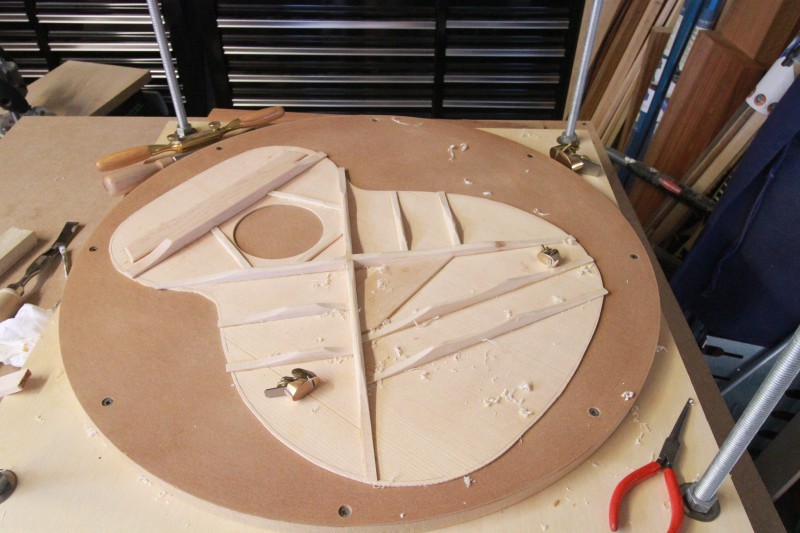
Yesterday I glued up the braces for the soundboard. After the glue set, I did some tap testing and the soundboard was completely dead! Not even a hint of sound, just a short thunk. So I got out the planes and started carving the "marimba bars" (braces). I'm getting something now but it still doesn't sound very good. The back, having done nothing to it, still sounds better. I realize I'm dancing the delicate dance of removing mass from the braces while keeping the necessary structural rigidity. I just hope I get something musical before ruining it. Maybe this is what happens when the boards you begin with don't sing. |
Author: | Pat Foster [ Tue May 15, 2018 11:13 am ] |
Post subject: | Re: First Acoustic Build - Martin OM Style |
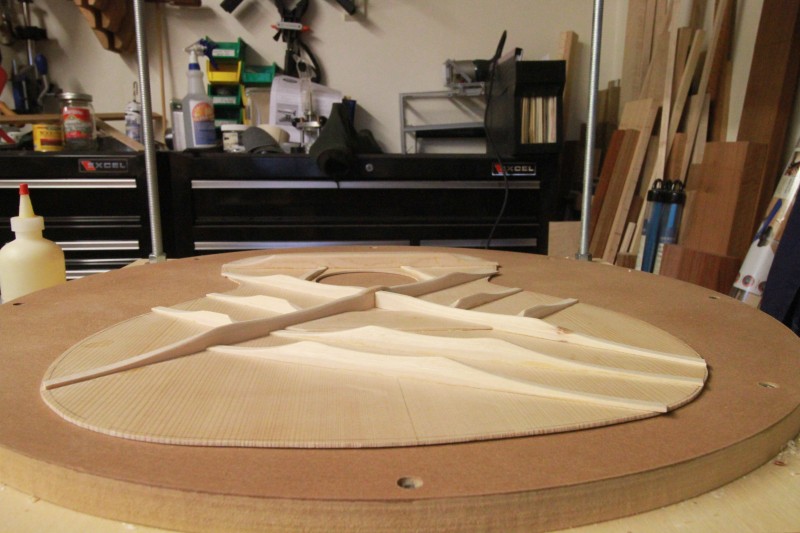
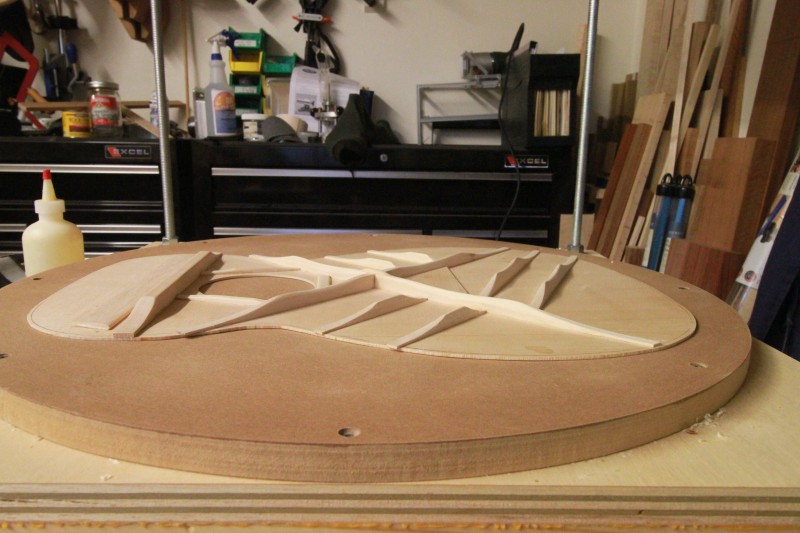
Looks like you're off to a good start. Tapping tops can be iffy for a new acoustic builder. They need to be held in certain spots, and tapped in certain spots to make a good comparison. The Scott Antes plan is mostly a good one. It helped me get started on my first build, also an OM. His plan, IMO, has the top bracing too stiff. If I recall, the braces were spec'ed at over 1/2" wide. I eventually ended up with 1/4" wide for all the bracing below the soundhole, and the tallest, 1/2" at the intersection of the x-braces. Your finger braces could be about half that height and could taper to nothing well short of the lining. The tone bars and lower x arms can also taper to nothing well before reaching the linings. It looks like the tone bar height could also come down quite a bit, maybe by half. edit: BTW, a photo of the top bracing at a lower angle might be useful here. |
Author: | Jules [ Tue May 15, 2018 5:36 pm ] |
Post subject: | Re: First Acoustic Build - Martin OM Style |
Thanks for all the tips, Pat! I got a sigh of relief from that. I discovered after I made the last post here that I was making another newbie mistake - I wasn't putting the board to my ear. Once I did that, I could hear notes and sustain I did not hear before. But the back still sounds better. I'll take your advice and knock the braces down a bit more. Here's those side views: |
Author: | Haans [ Tue May 15, 2018 5:48 pm ] |
Post subject: | Re: First Acoustic Build - Martin OM Style |
Nice work Julie! How thick is the top? |
Author: | Jules [ Tue May 15, 2018 8:42 pm ] |
Post subject: | Re: First Acoustic Build - Martin OM Style |
Haans wrote: Nice work Julie! How thick is the top? Thanks Haans! The top is .09" thick. It was pretty bendy before the braces were glued on. |
Author: | Freeman [ Tue May 15, 2018 8:53 pm ] |
Post subject: | Re: First Acoustic Build - Martin OM Style |
Lookin' good, Jules. I just finished an OM from the Antes plans - my top is cedar so I kept the braces a little thicker and taller than what I would use for spruce. Not a great picture but the braces don't look that much different from yours Attachment: IMG_4002-3.jpg I've finished mine and been playing if for a few weeks - I'm quite happy with it and I think you will be too |
Author: | SnowManSnow [ Wed May 16, 2018 6:18 am ] |
Post subject: | Re: First Acoustic Build - Martin OM Style |
Stay in he course:) it’ll be much better than you think! Sent from my iPhone using Tapatalk Pro |
Author: | Haans [ Wed May 16, 2018 8:50 am ] |
Post subject: | Re: First Acoustic Build - Martin OM Style |
Jules wrote: Haans wrote: Nice work Julie! How thick is the top? Thanks Haans! The top is .09" thick. It was pretty bendy before the braces were glued on. You are welcome! Top is a bit thin by my standards to start and I would't even try to tap til after 24 hours of drying. BTW, you should lean the top so that both sides get the same chance at humidity. Tapping is a learned experience and will take you a few guitars to start to figure it out. I always used the wooden T handle ream. Holding it by the steel tip, I would tap at the bridge plate location to start on the top with a thumb through the sound hole. You might get a better idea that way... You should be fine with a little heavier bracing if it was floppy. Keep up the good work... |
Author: | Jules [ Wed May 16, 2018 10:37 am ] |
Post subject: | Re: First Acoustic Build - Martin OM Style |
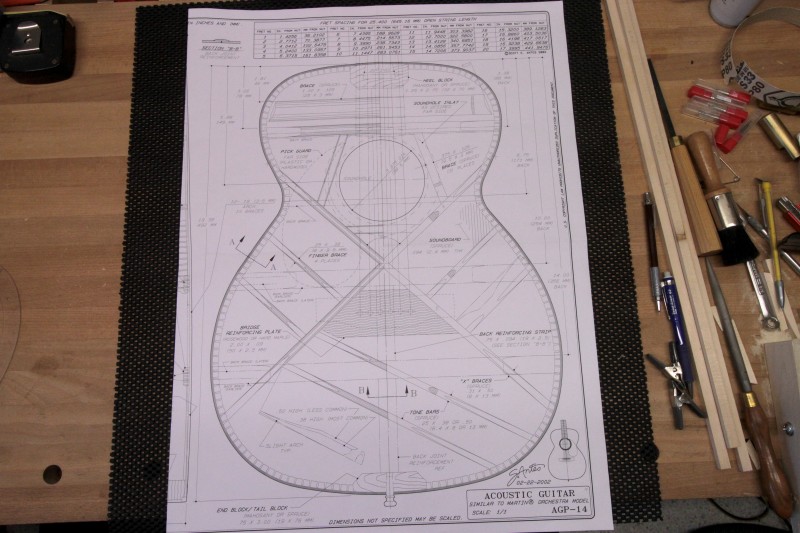
Freeman wrote: Lookin' good, Jules. I just finished an OM from the Antes plans - my top is cedar so I kept the braces a little thicker and taller than what I would use for spruce. Not a great picture but the braces don't look that much different from yours Thanks for the compliment but especially for the photo, Freeman. I need all the help I can get. You said you used the Antes plan but I don't see the side braces you installed on the plan. Maybe I missed it? I can't say for sure, but it seems pretty much all the guitar pics I've seen in progress had side braces installed. How do you determine how many and their locations? |
Author: | Jules [ Wed May 16, 2018 10:51 am ] |
Post subject: | Re: First Acoustic Build - Martin OM Style |
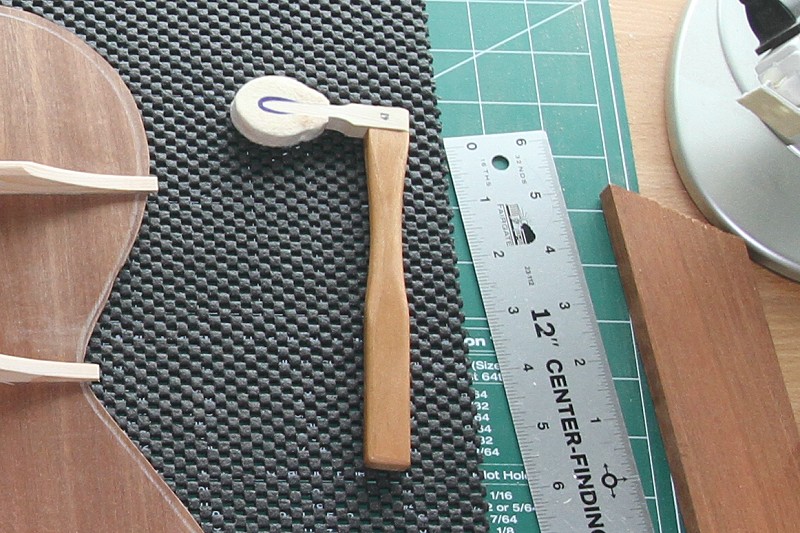
Haans wrote: Top is a bit thin by my standards to start and I would't even try to tap til after 24 hours of drying. BTW, you should lean the top so that both sides get the same chance at humidity. Tapping is a learned experience and will take you a few guitars to start to figure it out. I always used the wooden T handle ream. Holding it by the steel tip, I would tap at the bridge plate location to start on the top with a thumb through the sound hole. You might get a better idea that way... You should be fine with a little heavier bracing if it was floppy. Keep up the good work... Thank you again, Haans! The tool I've been using was made with a piano hammer attached to a piece of cherry. I saw a lute luthier using it in a video and decided to give it a try. I get better response than with a fingertip or knuckle. I have other size heads (had to buy a set of 10). I'm going to see if there's any difference between the largest and smallest, just out of curiosity. |
Author: | Freeman [ Wed May 16, 2018 11:15 am ] |
Post subject: | Re: First Acoustic Build - Martin OM Style |
Jules wrote: Freeman wrote: Lookin' good, Jules. I just finished an OM from the Antes plans - my top is cedar so I kept the braces a little thicker and taller than what I would use for spruce. Not a great picture but the braces don't look that much different from yours Thanks for the compliment but especially for the photo, Freeman. I need all the help I can get. You said you used the Antes plan but I don't see the side braces you installed on the plan. Maybe I missed it? I can't say for sure, but it seems pretty much all the guitar pics I've seen in progress had side braces installed. How do you determine how many and their locations? When I say I used the Antes plans it was for the shape and size of the body (and making sure it would fit in a commercial case), the general layout of the braces and their starting thickness/height. I also had a set of the StewMac 000 plans and the ones that comes with Kinkead's book on the bench so there is a little of everything there. There are also some things I just do automatically - the side braces for instance, I often put the approximately at the ends of the back braces. There are lots of discussions about how stiff the sides should be - all I'm trying to do is prevent the infamous key crack like my old Martin developed. I'll add a comment about tap tuning your plates that lots of my fellow forumites will disagree with. I've built 23 guitars now, about half of them X braced acoustics of various shapes and sizes. I have studied the Siminoff book on tap tuning and sat in seminars by Siminoff, Greven and Bourgoise - trying to hear what they hear when they build a guitar. Do I know what I'm doing - absolutely not but every one of my guitars sounds good. I'm convinced that following an established design, using good materials and erring on the side of light bracing will result in very playable instrument. I think you will be very pleased with yours, keep it up ps - not to highjack your thread but here is the way mine turned out viewtopic.php?f=10101&t=50478 |
Author: | Jules [ Thu May 17, 2018 8:14 am ] |
Post subject: | Re: First Acoustic Build - Martin OM Style |
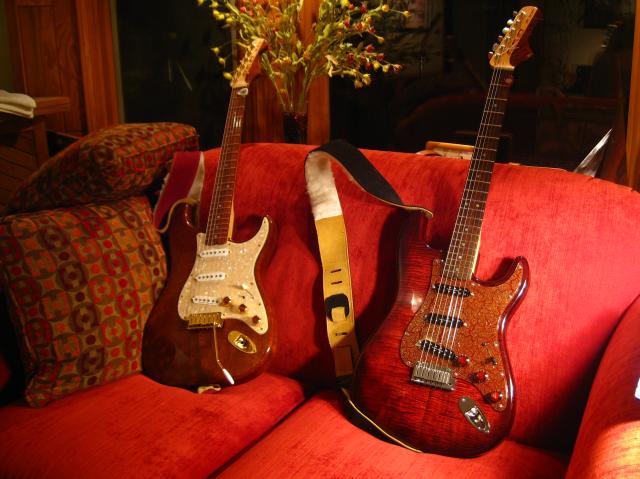
Thank you again, Freeman. That's a very nice looking guitar! I love all the help and learning coming from this forum. I think it's going to make my first acoustic build less daunting. But I am enjoying the challenge. Despite not to tackle making a neck from scratch on my first electric guitar, I went ahead and did it anyway. It was the most enjoyable part of the build. Here's the first two I made: |
Author: | Jules [ Thu May 17, 2018 12:22 pm ] |
Post subject: | Re: First Acoustic Build - Martin OM Style |
This is crazy. I'm working on bending the sides right now. It took the bending iron (Stew Mac's) an hour for the center to get above 200 degrees. The core was around 290, the section closest to the wood block was 240 while the other end was around 215. Once the center was over 210 I started working on the waist. BTW, this is my second practice piece. It took me over 30 minutes to bend the waist, with a damp rag between the wood and iron, as advised by Robbie O'Brien. Then I moved to the lower bout. The wood hardly moved. I checked the iron temp and it was between 120-130 degrees. No wonder nothing was happening! I'm not very impressed with this heating iron. At this rate it could take all day just to bend one side. |
Author: | doncaparker [ Thu May 17, 2018 1:28 pm ] |
Post subject: | Re: First Acoustic Build - Martin OM Style |
It sounds to me like the temperature control is broken on that iron. It is designed to get much hotter than that, and to stay at the right temperature once you get there. Send it for service, rather than give up on bending by hand. It really is supposed to be easier than what you are experiencing, and it would be if you had an iron that was not crapping out on you. |
Author: | Haans [ Thu May 17, 2018 4:05 pm ] |
Post subject: | Re: First Acoustic Build - Martin OM Style |
Julie, I don't see anything wrong with the hammer you are using, I just preferred something that made a sharp rap. Might have been because I tapped so many mandolin plates. Whatever you use, it will take time (instruments) to "get it". Might start out with various different things until you find something that "talks to you". I tried a Siminoff hammer for a while, but went back to my ream. Sounds like you are having fits with bending ribs. I started with mandolins, so it was much easier as they were smaller. I do remember that the Stew-Mac iron got so hot that drops of water jumped off the iron. I was forever searing the maple, but it didn't matter much as they were sunburst anyway. There is a point at which the wood starts to give, and then, as others have mentioned, it's a slow bend. You get faster at it as you progress, and something like Super Soft 2 helps. When I first started building guitars (the first time) I had a boiling trough made that would fit over two burners of the kitchen stove. I had a couple of straps that kept the wood in the water, covered it with tin foil and let it go for hours, till ribs just drooped like a noodle. Then I would quickly take the rib and clamp it in the mold. How's that for old time! The bad part about that is that the wood could buckle in areas but it worked. I probably made the ribs thicker so that I could scrape and sand them flat again. The second time I started building guitars, I just bought John Hall's bending set-up. If you can afford it, worth it. Hope that all helps... |
Author: | Jules [ Thu May 17, 2018 4:50 pm ] |
Post subject: | Re: First Acoustic Build - Martin OM Style |
doncaparker wrote: It sounds to me like the temperature control is broken on that iron. It is designed to get much hotter than that, and to stay at the right temperature once you get there. Send it for service, rather than give up on bending by hand. It really is supposed to be easier than what you are experiencing, and it would be if you had an iron that was not crapping out on you. I was on the Stew Mac website and they say it takes 45-60 minutes to reach temperature. I also saw the iron is only 200 watts. That's not much and it explains why it takes so long to heat up and why it loses temperature so easily. Not saying the stat is not the problem but at 200 watts, with continually wetting the rag, I'm probably pushing that iron to its limits. |
Author: | doncaparker [ Thu May 17, 2018 6:49 pm ] |
Post subject: | Re: First Acoustic Build - Martin OM Style |
Well, the 45-60 minutes of heating up is supposed to get you up to 350-400 degrees, with a max temp of 500 degrees. If your iron can’t even break 300 degrees, I think it’s not working right. |
Author: | Jules [ Fri May 18, 2018 8:20 am ] |
Post subject: | Re: First Acoustic Build - Martin OM Style |
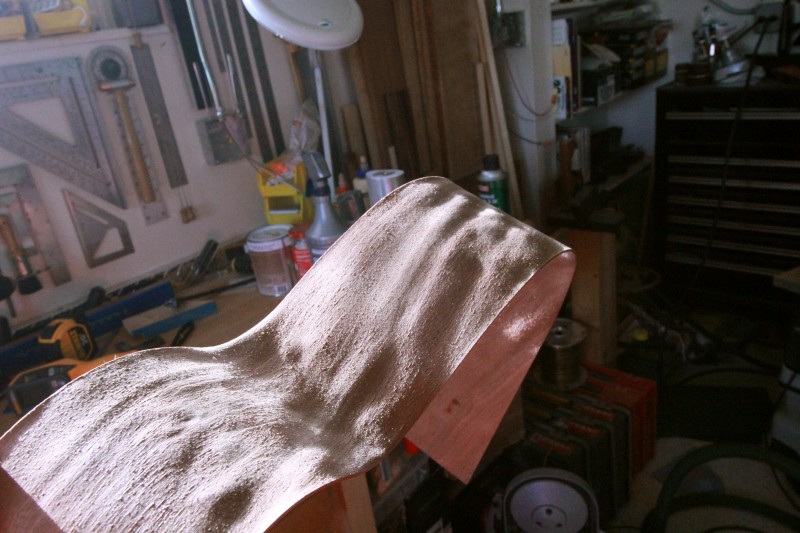
Don, one thing I later read on SM's website was they say IR thermometers don't read the iron's temperature accurately because the IR waves bounce off the aluminum. I've been using a Fluke VT02 IR thermometer to read the temps. While it may not be accurately reading the temperature, I know there was one time the steaming stopped (with a wet rag on the iron) and I measured 198 degrees. So the readings I'm getting with the IR are still somewhat close. But maybe I'll have to drop another $50 and get a decent surface thermometer before I know for sure. I managed to get the second test piece bent so it fit in the mold. I did my best to keep the wood as dry as possible because I saw rippling on the first test piece. But try as I may, the wood simply would not bend without being wetted. So I proceeded to do whatever was necessary to get the wood to bend (lots of spritzing) until the side fit in the mold. This morning sunlight was blazing through the window as I pulled the half from the mold. Finally, it was starting to look like a guitar. As I passed the piece across the sunlight I realized all wasn't as good as it seemed. The sunlight raking across the wood told a very different story. With the wood being .085" thick, I don't think there would be much left of it if I scraped and sanded that surface smooth. I'm going to cut off a section of test piece #1, thin it to .085" and see if there's any way I can bend it with little or no moisture and see how that goes. I'm not brimming with confidence at the moment. |
Author: | banjopicks [ Fri May 18, 2018 8:37 am ] |
Post subject: | Re: First Acoustic Build - Martin OM Style |
Wow that looks awful. You're scaring me, ive only bent mandolin sides and never seen anything like that. |
Author: | johnparchem [ Fri May 18, 2018 8:55 am ] |
Post subject: | Re: First Acoustic Build - Martin OM Style |
I read through the post, but missed how thick you have the sides when bending. I bend at .080". I will take the area involved with a Venetian cutaway to .070". I bend with the Iron on maximum(probably just on), I spray the iron to see if it is up to temp. Drops dancing like crazy means it is hot to me. I only use enough water to facilitate the transfer of heat. Wet wood wants to stay at about 220 F because it takes a lot of energy to change water to steam. I hold the wood on the flattest part of the iron to get the most heat transfer and work the bend on the narrowest part of the iron. The length of time bending would be of concern to me as I have found that as the wood is heated for a long time it takes a set where it wont bend. |
Page 1 of 6 | All times are UTC - 5 hours |
Powered by phpBB® Forum Software © phpBB Group http://www.phpbb.com/ |