Official Luthiers Forum! http://mowrystrings.luthiersforum.com/forum/ |
|
Side dot jig.... http://mowrystrings.luthiersforum.com/forum/viewtopic.php?f=10101&t=50470 |
Page 1 of 2 |
Author: | bcombs510 [ Thu Mar 29, 2018 7:25 am ] |
Post subject: | Side dot jig.... |
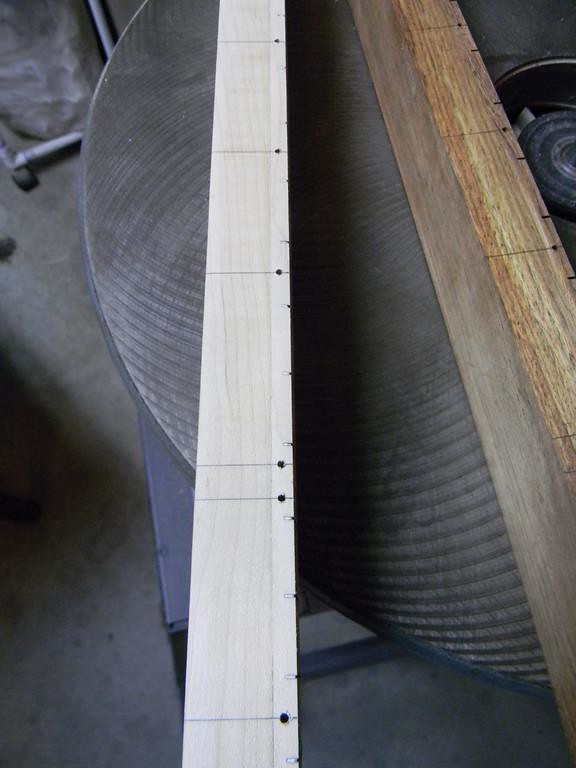
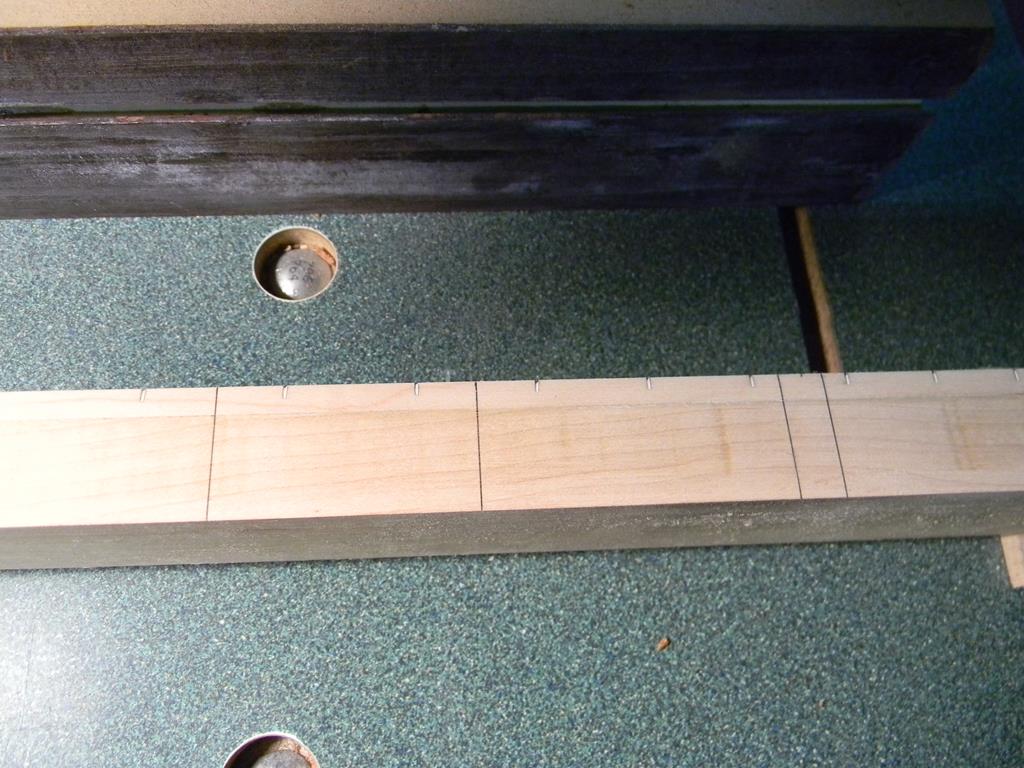
Does anyone have pictures of the Todd Stock side for jig? All his posts are removed and I see everyone’s responses but not the jig. I searched a bit online and saw a plexiglass model that looks interesting. Below is what I came up with. It’s a little finicky to get the bit aligned and then get the fence clamped down. If anyone else uses a jig for this and is willing to share I’d like to see how to improve or rebuild this. The results were good, but this idea assumes the board is not a compound radius (I don’t use that today). The one I saw online top mounted so you could align however you want. I use this guide block to align everything first: The board is attached to a sled with double stick tape: Each fret position is marked with an indexing pin: Some pics of halo markers. One is a silver ring filled with ebony dust, the other is a silver ring filled with standard 1.5mm white plastic side dot material in the center: Sent from my iPhone using Tapatalk |
Author: | Woodie G [ Thu Mar 29, 2018 7:55 am ] |
Post subject: | Re: Side dot jig.... |
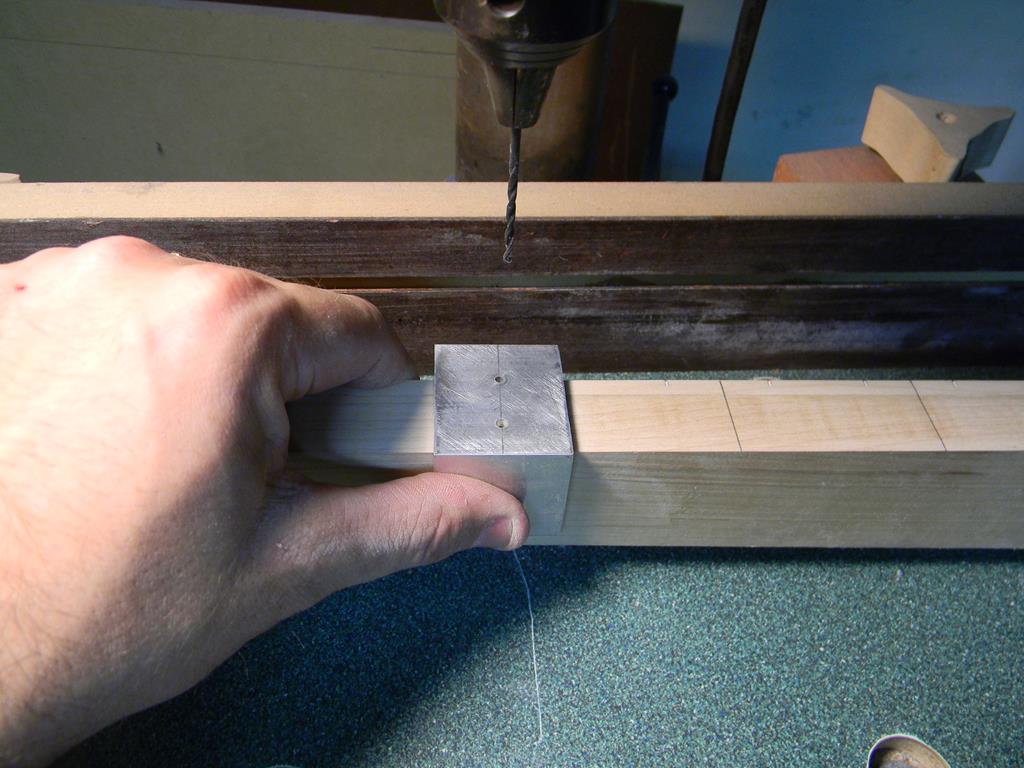
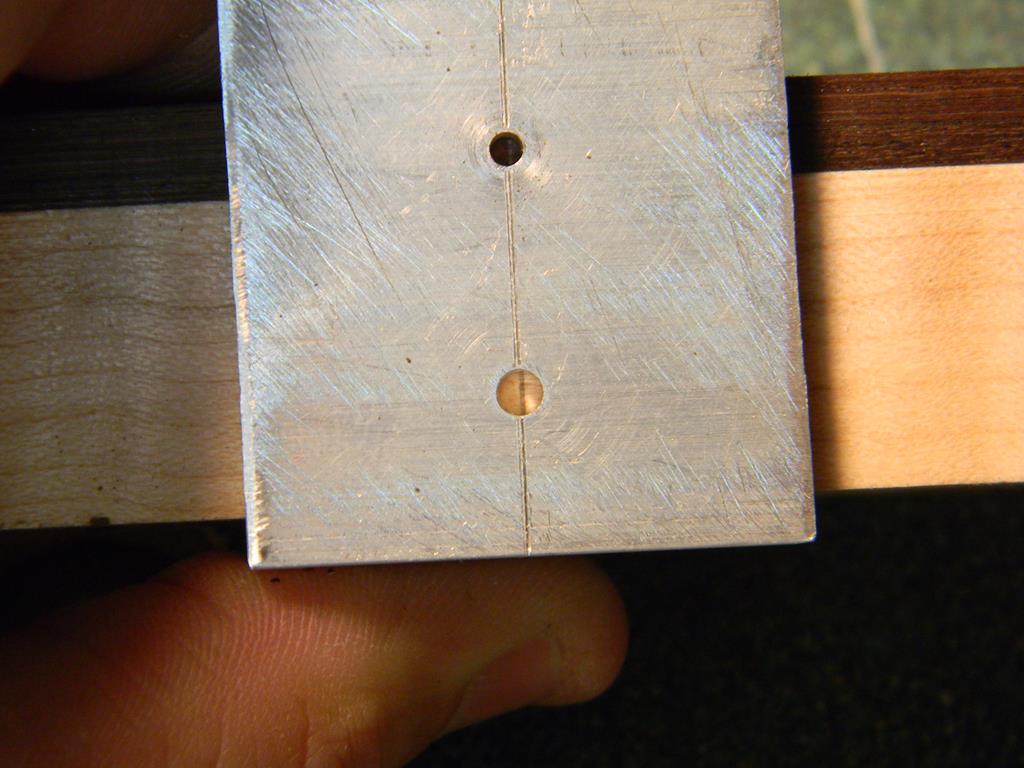
These are the photos I have in the data files for the building guide. I believe this jig has since been upgraded to use drill bushings to address wear, but I hope this addresses your request. Attachment: Side-Marker-1.jpg Attachment: Side-Marker-2.jpg Attachment: Side-Marker-3.jpg Attachment: Side-Marker-4.jpg
|
Author: | bcombs510 [ Thu Mar 29, 2018 8:36 am ] |
Post subject: | Re: Side dot jig.... |
Thanks to you both. Yes, Woodie, thank you for sharing that. I like the idea a lot. Good point about the bit. I did have to chuck the bit way up in the press to keep it from deflecting. At 2.5mm, even that little 5mm exposure probably still reflects a little when it hits ebony. What I did was lower the bit just until it made contact, grab the sled and hold it up to the light to check that we are still centered, then drill (slowly) the rest of the way. Sent from my iPhone using Tapatalk |
Author: | Haans [ Thu Mar 29, 2018 8:39 am ] |
Post subject: | Re: Side dot jig.... |
Same here as Terry, center punch and drill. Most of the time I used large 3/32" tortoise dots on mandolins and guitars. Something about "over-jigging" never did appeal to me. Dots would take less than 15 minutes to do. |
Author: | jfmckenna [ Thu Mar 29, 2018 9:17 am ] |
Post subject: | Re: Side dot jig.... |
Same as Terry and Haans for me too. I just mark the center line between the frets then eyeball it. A nice awl mark and brad point bit gets it good. I always thought that it was my cheap bench top drill press but I always have bit wondering problems with it. For a jig I would suspect you would need something not unlike a classical guitar or mandolin tuner jig so that the bit is aligned perfect and fastened hard. |
Author: | bcombs510 [ Thu Mar 29, 2018 9:21 am ] |
Post subject: | Re: Side dot jig.... |
Haans wrote: Something about "over-jigging" never did appeal to me. Dots would take less than 15 minutes to do. Agreed, Hans. My wife continually says “it’s supposed to be handmade” to get me off of obsessing over ridiculous details that no-one cares about in the end. I spent some time recently thinking about what gets the most eye ball time on a guitar. Once the initial infatuation is over and the player stops marveling at the soundboard, rosette, inlays, etc... what are they stuck looking at? The side dots, side sound port (if there is one), the binding and purfling, etc... What else? For me, with the side dots... a screw up is such a tremendous amount of work to fix for such a little process. I’m not confident like you folks that I won’t blow it. I find myself walking a line between over jigging and handmade and I keep falling onto the jig side. Hopefully with time and confidence I’ll get my balance. Sent from my iPhone using Tapatalk |
Author: | dzsmith [ Thu Mar 29, 2018 10:09 am ] |
Post subject: | Re: Side dot jig.... |
I’d like to suggest erasing pencil marks before gluing in the dots. This will prevent the marks from being trapped under glue that may wick from the edge of the hole. I had an unpleasant experience with a Maple board. |
Author: | Terence Kennedy [ Thu Mar 29, 2018 10:14 am ] |
Post subject: | Re: Side dot jig.... |
One problem with a jig is you typically use it before the fretboard is glued. After gluing and leveling the side width could theoretically change (although admittedly very little). I found my freehand method to be faster and more accurate than any of the jigs I made but I am sure there are ones that work great. There was a discussion here on this topic years ago and I remember Tony Karol I think using a router bit in his drill press jig and saying it worked well to keep things from wandering. |
Author: | sdsollod [ Thu Mar 29, 2018 10:28 am ] |
Post subject: | Re: Side dot jig.... |
I have also been doing it freehand. I will use the awl to open up the hole as needed and then follow that with the drill bit. Seems like I can't find a 2mm brad point bit anywhere... |
Author: | bcombs510 [ Thu Mar 29, 2018 10:40 am ] |
Post subject: | Side dot jig.... |
sdsollod wrote: Seems like I can't find a 2mm brad point bit anywhere... Same here. The set of brad points that I have goes down to 1mm but the brad point stops as the 3mm bit. If you find a 2 or 2.5, please share! |
Author: | klooker [ Thu Mar 29, 2018 10:47 am ] |
Post subject: | Re: Side dot jig.... |
Not brad points but I use these - I like the short shank for this use. https://www.mcmaster.com/#standard-drill-bits/=1c6jwlf |
Author: | Terence Kennedy [ Thu Mar 29, 2018 10:58 am ] |
Post subject: | Re: Side dot jig.... |
LMI sells Brad points to match their side dot material. I use a 2mm dot and bit. |
Author: | nkforster [ Thu Mar 29, 2018 11:22 am ] |
Post subject: | Re: Side dot jig.... |
A few years back I spent a lot of time on making a jig that was perfect for a specific scale. Then I got really bored with working in large batches. It's just not for me. Like the others, I do it by hand. Though I also do it almost all by eye. The distance between the frets I "split" and mark a vertical pencil line. That line, I split by eye, mark with whatever is handy - a brad, a nail, then drill with a 1.5mm bit. If I'm using pearl, it's a 1.5mm dot which looks very neat. Or if it's for export, I use a pop rivet, snip it off, sand it smooth and tap it flush. I "borrowed" that trick from Marty Jacobson, the mandolin maker. saw it on his blog or on a video. I forget. Clever feller Marty. Nigel http://www.nkforsterguitars.com |
Author: | arie [ Thu Mar 29, 2018 11:29 am ] |
Post subject: | Re: Side dot jig.... |
I have a small milling machine that I use for side dots. |
Author: | J De Rocher [ Thu Mar 29, 2018 3:31 pm ] |
Post subject: | Re: Side dot jig.... |
I do them freehand too. After marking the positions with a fine point pencil, I use the brad point bit that I'm going to use to drill the holes like an awl to start the holes freehand. I spin the bit back and forth using my finger tips until the brad point itself is into the wood and the spurs of the bit just make contact. For small bits, this works better than an awl for me because the shape of the hole made by the awl doesn't match the shape of the brad tip well. That makes for a bit of slop which can result in the bit wandering slightly off target once the drill is fired up. Since slight errors in the position of a side marker are super noticeable to me, this solves the problem. I've also found that an awl tip can be shifted off the mark by a hard grain line into the soft grain next to it, but a sharp brad tip can usually be kept on target. |
Author: | Terence Kennedy [ Thu Mar 29, 2018 4:02 pm ] |
Post subject: | Re: Side dot jig.... |
J De Rocher wrote: I do them freehand too. After marking the positions with a fine point pencil, I use the brad point bit that I'm going to use to drill the holes like an awl to start the holes freehand. I spin the bit back and forth using my finger tips until the brad point itself is into the wood and the spurs of the bit just make contact. For small bits, this works better than an awl for me because the shape of the hole made by the awl doesn't match the shape of the brad tip well. That makes for a bit of slop which can result in the bit wandering slightly off target once the drill is fired up. Since slight errors in the position of a side marker are super noticeable to me, this solves the problem. I've also found that an awl tip can be shifted off the mark by a hard grain line into the soft grain next to it, but a sharp brad tip can usually be kept on target. Great idea. I use the StewMac inlay scribe which is quite fine but definitely can be deviated by a grain line. I am going to try that. |
Author: | Colin North [ Thu Mar 29, 2018 4:04 pm ] |
Post subject: | Re: Side dot jig.... |
I use something similar to yours Brad, except I use glued blocks and wedges to secure the workpiece, and blocks instead of the incline you are using, which I can vary for different tapers of FB with a wedge. (Sorry, no pics at the moment) I use a multi radius FB as standard, with the bass side lower than the treble ( for more even string height at the bridge) so that side of the FB is tapered and quite narrow. The jig accounts for that taper, putting the side dots in the centre of the edge. No index pin, as I use different scales, and fanned frets sometime, so I just line up the dots to marked positions. |
Author: | Fred Tellier [ Thu Mar 29, 2018 4:58 pm ] |
Post subject: | Re: Side dot jig.... |
From my model airplane days Robart hinge point drill jig. https://robart.com/products/hinge-point-drill-jig Fred |
Author: | Woodie G [ Thu Mar 29, 2018 6:03 pm ] |
Post subject: | Re: Side dot jig.... |
We reference to the bottom of the fretboard on new work, and drill only after the board is scraped and ready to glue up. The only marking is a line centered between the slots...line up with the line on the jig and drill. Tape or shim stock adjusts height. On repair work, we frequently add side dots to both classicals and (recently) an early Fylde 12 string that came in naked of side markers but with position markers on the face of the board... very odd duck and no truss rod, but nicely reinforced neck with perfect relief - these were eyeballed to split the difference from bottom to bevel and were drilled by hand. Some guitars live a charmed life and see little taken off the board for refrets...but we've had a few in where we've had to move side markers down from what must have been centered positions 60 or 70 years ago. Jigging for the operation is more about consistency than saving time. It is surprising how often we see a wonky dot or two on a guitar that shows a high level of persnicketyness otherwise. Certainly shows a bit of humanity. Layout always takes more time than seems reasonable...but worth the toll to avoid becoming reacquainted with Mr. Murphy. |
Author: | Pmaj7 [ Fri Mar 30, 2018 10:49 am ] |
Post subject: | Re: Side dot jig.... |
I do the same thing year after year; Spend a bunch of time thinking about what kind of cool jig I'm going to make for this,.........then do it by hand. In efforts to eradicate the wonky, how do you all measure between the frets? I use a digicali, but I wonder if a centering rule would be easier........hmmmm |
Author: | J De Rocher [ Fri Mar 30, 2018 1:52 pm ] |
Post subject: | Re: Side dot jig.... |
pat macaluso wrote: In efforts to eradicate the wonky, how do you all measure between the frets? I use a digicali, but I wonder if a centering rule would be easier........hmmmm I use a 6" machinist's rule or my StewMac 6" centering rule, whichever is the handiest. Those work fine for me for centering between frets. |
Author: | SteveSmith [ Fri Mar 30, 2018 2:28 pm ] |
Post subject: | Re: Side dot jig.... |
Mitutoyo 6" caliper, awl and a pin vise. Easier to drill accurate holes with a pin vise and it doesn't take that long. |
Author: | RogerC108 [ Mon Apr 02, 2018 2:39 pm ] |
Post subject: | Re: Side dot jig.... |
Here's my jig. Just a piece of angle aluminum with 2 holes and a center line. I mark my center line between the frets, line of the center line of my jig using the back sighting hole, then drill the front hole. You have to do this before carving the neck. |
Author: | Haans [ Mon Apr 02, 2018 4:44 pm ] |
Post subject: | Re: Side dot jig.... |
bcombs510 wrote: Haans wrote: Something about "over-jigging" never did appeal to me. Agreed, Hans. My wife continually says “it’s supposed to be handmade” to get me off of obsessing over ridiculous details that no-one cares about in the end. I spent some time recently thinking about what gets the most eye ball time on a guitar. Once the initial infatuation is over and the player stops marveling at the soundboard, rosette, inlays, etc... what are they stuck looking at? The side dots, side sound port (if there is one), the binding and purfling, etc... What else? For me, with the side dots... a screw up is such a tremendous amount of work to fix for such a little process. I’m not confident like you folks that I won’t blow it. I like your wife's thinking. I'm probably one of the only ones around here that thinks like that too. Most are too preoccupied with razor sharp perfection like Marvin, Collings, Olsen, etc. I'm stuck in 1915 with Orville. A little "wobble" here or there is not the end of the world. Here's a F5C with the tortoise dots touching the black line of the purfling...yes, folks they are supposed to touch the line. Notice the 15th fret dot is just shy of touching...big deal. What do guitar players see while they are playing? I would guess most bluegrass standup players see the mic, audience. For us "sit down" players, binding, purfling, strings, rosette, . Personally, I like to watch my finners and marvel that I can still make them move... Getting the confidence? Practice, practice, practice. |
Page 1 of 2 | All times are UTC - 5 hours |
Powered by phpBB® Forum Software © phpBB Group http://www.phpbb.com/ |